Thursday, August 18, 2011

More trough work, and planting!

It's been a few days since I last posted, because after my last post (which is duplicated over on Backyard Aquaponics) there was quite the discussion on the strength of the trough walls, and whether they would hold.

I'm using a modified design of a proven system (The Friendly's, in Hawai'i), and I've mostly made it stronger, so I wasn't worried, until I posted over at BYAP. =)

As I'm not an engineer, I started to doubt my ideas, but someone explained how this works, and now I'm moving forward.

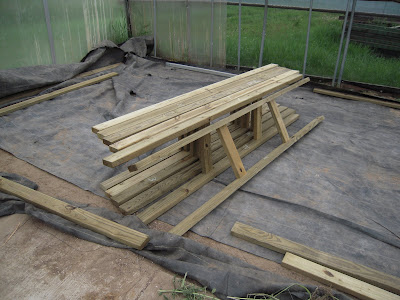
Overview of the Friendly troughs
Friendly demo showing the liner and how strong it is.


I've filled the first trough part way and started planting.


I insulated and clad the fish tank for this greenhouse.


I've filled one of the 100 gallon stock tanks with washed gravel. I started to plumb from the fish tank to the gravel beds, but I haven't finished, and I didn't take pics.

I hope to finish up the plumbing on the growbeds and the first trough in the next few days, so I'll have a working system ready for fish soon. Then I'll plumb in the next troughs as I finish them.

Then, duplicate the system in greenhouse #2!

So far, I've planted:
  • Tatsoi
  • Mizuna
  • Nastutiums
  • Caraflex cabbage
  • Cucumbers, lemon
  • cucumbers, Armenian
  • Romaine (cos) lettuce
  • Arugula
  • many fancy non-cos lettuces
  • pakchoi
  • vitamin greens
  • Basil - Aroma 2, Sweet Dani, and Amethyst
  • Savoy-leafed spinach
  • spaghetti squash
  • stevia
  • watercress
  • Cilantro


Monday, August 8, 2011

Building the troughs!

I am very sorry to have been out of touch. I got a terrible case of food poisoning a few weeks ago which took me out of circulation for a week. The Dept. of Health interviewed me to find the source (no word yet).

Lots of progress!

I've lately been working on the troughs. The first one is nearly complete. The plumbing hasn't been added, but that shouldn't take long. I did it alone, except for the final bit of adding the liner.

First, I laid down the base:
Image
I have the base up on 2x4s to allow me to clamp. I removed the extras as soon as the base was built.
The cross-bars are to prevent the bottom from bowing out under the weight of the water.

Then, I constructed sections of the sides. The vertical bars are 16" (40.6cm), because the plywood and insulation is 4' wide, so 16" is 1/3 of that:
Image
Constructing these sections separately was a mistake. :think: The length of the 2x4s changes in the heat and humidity, so attaching them was problematic. Next time, I'll bring in the precut pieces of 2x4 and construct the troughs in place.

And then I attached the side sections.
Image

And attached, and attached...
Image

I then added insulation and plywood to the sides. Each piece of ply and insulation has been ripped into thirds lengthwise.
Image

and added insulation along the bottom. This was also a mistake.
Image
Having the insulation above the crossbars simply leads to a lot of broken insulation, and I'm unable to walk along the bottom of the trough. I will put the cross-bars above the insulation on the next trough.

The liner is 12' (3.7m) wide and 100' (30.5m) long, from Valiant Industries, and comes on a roll.

This took two people. :D

Image

Clamped the end to help lay out the whole thing:
Image

All laid out:
Image
(My friend Fer walking away from the camera)

Folding the corners (holy hell that was hard!):
Image

Putting in a few inches of water to get the liner to settle before the final staple job:
Image

This is how I left it last night before we left, with a few rafts inside to give any animals a place to rest if they fall in.
Image

I'll add some braces and finish filling it tomorrow, and check for leaks.